ESP8266 是上海乐鑫 (Espressif Systems (Shanghai) Pte., Ltd.) 推出的一款 Wi-Fi 芯片,其内置一颗 Tensilica L106 32 bit 的处理器,具有超低功耗的 16 位 RSIC,CPU 时钟速度为 80-160 MHz,并支持实时 RTOS 操作系统,是物联网开发的首选设备。ESP8266 在 Windows 开发上可以使用现成的基于 Eclipse 的 Ai-Thinker IDE,但要是使用 Linux 开发就得自己配置一下环境了,本文就 ESP8266 在 Deepin Linux 上的开发展开。
文中所述内容已有可用的自动化构建项目,详情 https://github.com/pfalcon/esp-open-sdk
交叉编译器
ESP8266 的交叉编译器为 xtensa-lx106-elf,需要通过 crosstool-NG 编译获得,具体方法如下。
编译平台信息
$ uname -a
Linux lanseyujie 4.9.0-deepin13-amd64 #1 SMP PREEMPT Deepin 4.9.57-1 (2017-10-19) x86_64 GNU/Linux
$ gcc -v
gcc version 6.4.0 20170724 (Debian 6.4.0-2)
$ make -v
GNU Make 4.1
需要的依赖包
sudo apt install git wget build-essential autoconf gperf bison flex texinfo gawk libtool libtool-bin libncurses5-dev expat libexpat1-dev
编译 crosstool-NG
# 克隆 crosstool-NG 的 lx106 分支
git clone -b lx106 git://github.com/jcmvbkbc/crosstool-NG.git

# 配置与编译 ct-ng
cd crosstool-NG
./bootstrap && ./configure --prefix=`pwd` && make && make install

# 生成配置文件
./ct-ng xtensa-lx106-elf
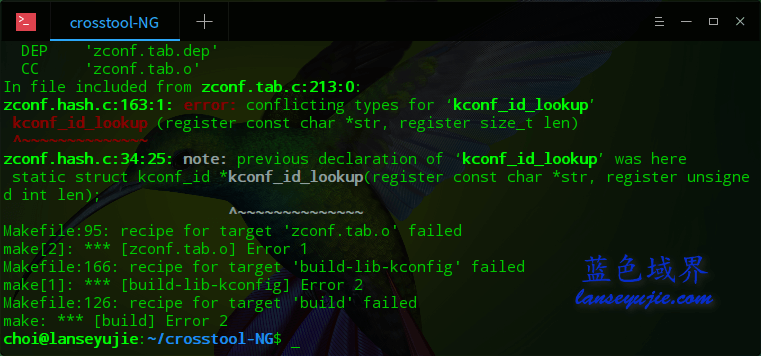
配置与编译 ct-ng 的过程中会遇到如下错误:
In file included from zconf.tab.c:213:0:
zconf.hash.c:163:1: error: conflicting types for ‘kconf_id_lookup’
kconf_id_lookup (register const char *str, register size_t len)
^~~~~~~~~~~~~~~
zconf.hash.c:34:25: note: previous declaration of ‘kconf_id_lookup’ was here
static struct kconf_id *kconf_id_lookup(register const char *str, register unsigned int len);
^~~~~~~~~~~~~~~
Makefile:95: recipe for target 'zconf.tab.o' failed
make[2]: *** [zconf.tab.o] Error 1
Makefile:166: recipe for target 'build-lib-kconfig' failed
make[1]: *** [build-lib-kconfig] Error 2
Makefile:126: recipe for target 'build' failed
make: *** [build] Error 2
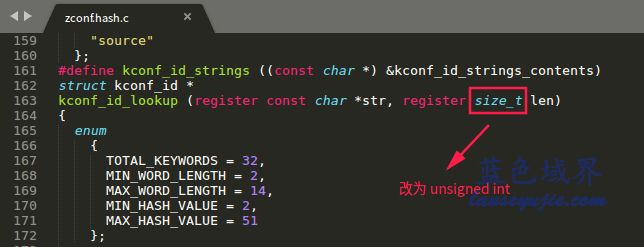
解决方法:修改 kconfig/zconf.hash.c 的 163 行的 size_t 类型为 unsigned int 再重新配置编译即可。
配置 crosstool-NG
在 crosstool-NG 目录下执行:
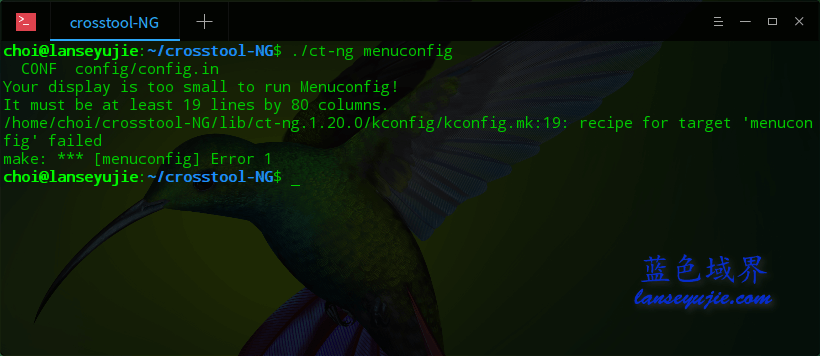
# 命令行的窗口尺寸要调大一些,否则不会出现配置界面
./ct-ng menuconfig
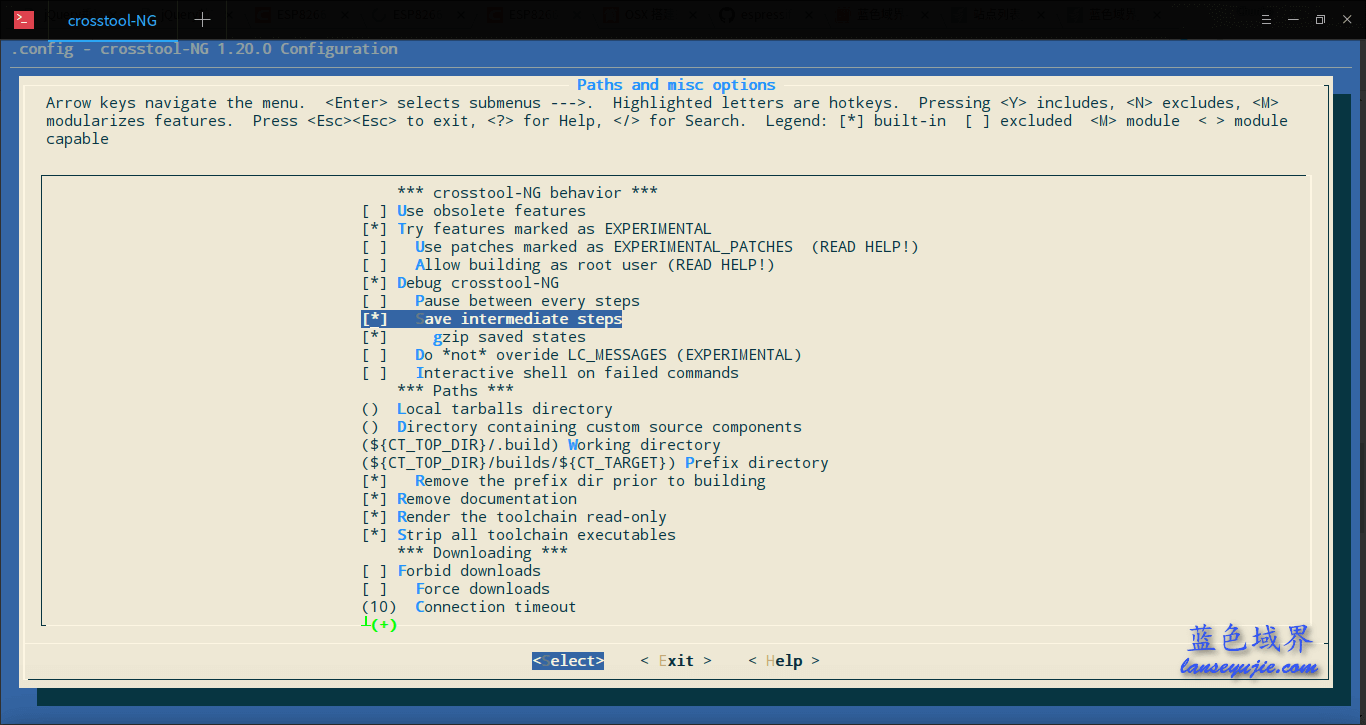
设置保存中间步骤,按 Y 选中。
Paths and misc options -> Debug crosstool-NG -> Save intermediate steps
设置多线程编译,推荐设置为 4。
Paths and misc options -> Number of parallel jobs
编译 xtensa-lx106-elf
./ct-ng build
编译时需要下载多个源码包,建议编译时使用代理或提前下载好源码包到 .build/tarballs 目录。
binutils-2.24.tar.bz2 ftp://ftp.gnu.org/gnu/binutils/
gdb-7.5.1.tar.bz2 ftp://ftp.gnu.org/gnu/gdb/
mpc-1.0.2.tar.gz ftp://ftp.gnu.org/gnu/mpc/
cloog-0.18.1.tar.gz http://www.cloog.org
gmp-5.1.3.tar.xz ftp://ftp.gnu.org/gnu/gmp/
mpfr-3.1.2.tar.xz ftp://ftp.gnu.org/gnu/mpfr/
gcc-4.8.2.tar.bz2 ftp://ftp.gnu.org/gnu/gcc/gcc-4.8.2/
isl-0.12.2.tar.bz2 http://isl.gforge.inria.fr
newlib-1.20.0.tar.gz ftp://sourceware.org/pub/newlib/index.html
编译过程为分段进行,如果在某处编译出错,除错后可以继续上一步进行编译。
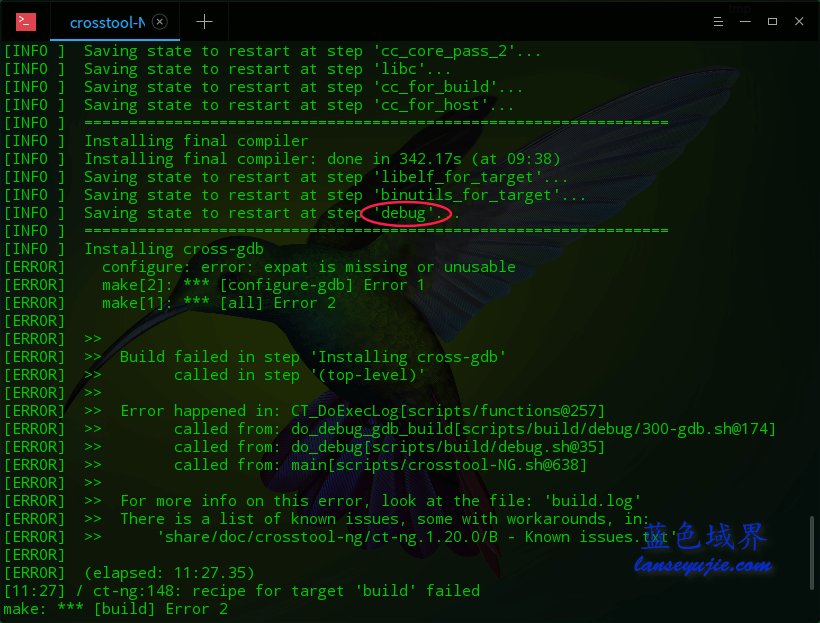
# 如上图中的错误,这是因为我在编译时没有安装 libexpat1-dev 导致的,安装好可以通过以下命令继续上一步编译
./ct-ng debug+
8 线程编译耗时约 19 分钟,已编译好的工具链(含 Xtensa 的头文件和静态链接库文件)已 push 到 Github[https://github.com/lanseyujie/xtensa-lx106-elf.git]。
环境搭建
# 编译好的工具链在 builds 目录里
# 修改文件夹权限
sudo find ./builds/xtensa-lx106-elf/ -type d -print|xargs chmod 755;

# Xtensa 头文件
wget -c https://raw.githubusercontent.com/esp8266/esp8266-wiki/master/include.tgz
tar zxvf include.tgz -C ./builds/xtensa-lx106-elf/lib/gcc/xtensa-lx106-elf/4.8.2/
# 修改头文件文件夹权限
sudo find ./builds/xtensa-lx106-elf/ -type d -print|xargs chmod 755;

# Xtensa 静态链接库文件
wget -c https://raw.githubusercontent.com/esp8266/esp8266-wiki/master/libs/libhal.a
wget -c https://raw.githubusercontent.com/esp8266/esp8266-wiki/master/libs/libc.a
mv libhal.a libc.a ./builds/xtensa-lx106-elf/lib/gcc/xtensa-lx106-elf/4.8.2/

sudo mv ./builds/xtensa-lx106-elf/ /opt/

# 环境变量
sudo nano /etc/profile
export PATH=$PATH:/opt/xtensa-lx106-elf/bin

# 重启后生效
# 测试
$ xtensa-lx106-elf-gcc -v
gcc version 4.8.2 (crosstool-NG 1.20.0)
开发测试
Demo 项目
git clone https://github.com/espressif/ESP8266_RTOS_SDK.git

cd examples/mqtt_demo/
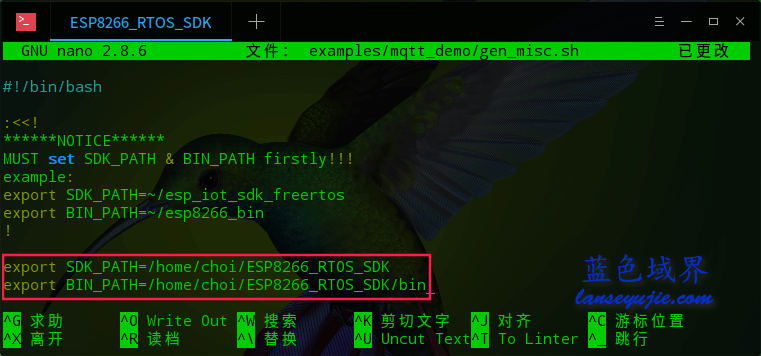
# 需要修改 SDK_PATH 和 BIN_PATH 的路径
nano gen_misc.sh
export SDK_PATH=$SDK_PATH
export BIN_PATH=$BIN_PATH

# 注意:要在 gen_misc.sh 的目录下执行此脚本
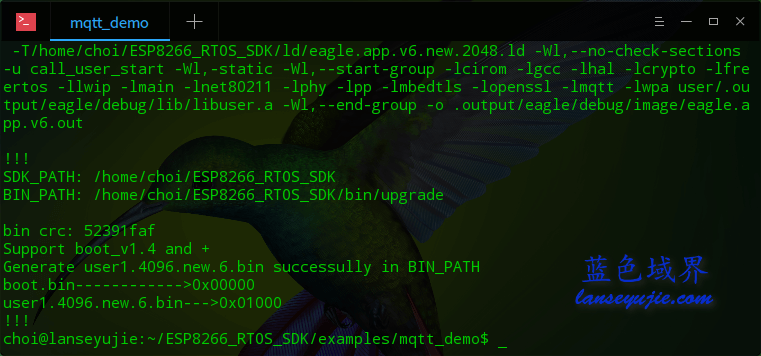
./gen_misc.sh

Please check SDK_PATH & BIN_PATH, enter (Y/y) to continue: Y

STEP 2: choose bin generate(0=eagle.flash.bin+eagle.irom0text.bin, 1=user1.bin, 2=user2.bin)
enter (0/1/2, default 0): 1

STEP 3: choose spi speed(0=20MHz, 1=26.7MHz, 2=40MHz, 3=80MHz)
enter (0/1/2/3, default 2): 2

STEP 4: choose spi mode(0=QIO, 1=QOUT, 2=DIO, 3=DOUT)
enter (0/1/2/3, default 0): 0

STEP 5: choose spi size and map
    0= 512KB( 256KB+ 256KB)
    2=1024KB( 512KB+ 512KB)
    3=2048KB( 512KB+ 512KB)
    4=4096KB( 512KB+ 512KB)
    5=2048KB(1024KB+1024KB)
    6=4096KB(1024KB+1024KB)
    7=4096KB(2048KB+2048KB) not support ,just for compatible with nodeMCU board
    8=8192KB(1024KB+1024KB)
    9=16384KB(1024KB+1024KB)
enter (0/2/3/4/5/6/7/8/9, default 0): 6
烧写固件
烧写工具的安装请参考文章 《NodeMCU入门》的 烧写 NodeMCU 固件 部分。
# 擦除 Flash
esptool.py -p /dev/ttyUSB0 -b 921600 erase_flash

# 烧写固件
esptool.py -p /dev/ttyUSB0 write_flash -fm qio 0x00000 ./bin/boot_v1.6.bin 0x01000 ./bin/upgrade/user1.4096.new.6.bin 0x3fb000 ./bin/blank.bin 0x3fc000 ./bin/esp_init_data_default.bin
ESP8266 调试串口默认波特率为 74880 band/s,可以通过 SecureCRT、Putty 等工具查看串口输出。但是 Linux 下串口输出会出现乱码?Windows 正常?解决方法如下:
miniterm.py /dev/ttyUSB0 74880
miniterm.py 是 pyserial 的一部分,安装 esptool 时会依赖安装 pyserial 的。
* 参考资料:https://github.com/esp8266/esp8266-wiki/wiki/Toolchain

